
Unit testing is a key skill for any modern software developer. There’s no better way to avoid regressions and improve code quality. That’s why you, as a Java developer, should master Java unit testing, and this post is here to help you.
We’ll open by answering the basic what-why-how of unit testing questions. After that’s out of the way, we’ll get practical and show you how to use JUnit to write your first unit test.

Prerequisites
Before starting, let’s review some prerequisites you must meet to follow the tutorial part of the post:
- You don’t need any previous knowledge of unit testing in Java or other languages.
- We assume you have at least some experience with Java.
- We also assume you have a proper Java environment ready: the JSK installed, an IDE or code editor, and so on.
- I suggest you use the IntelliJ IDEA IDE from JetBrains—the community edition is free, and it’s what I’ll use in this article.
A quick disclaimer
There’s no one-size-fits-all definition of a unit test, as strange as it may seem. For this introductory post, I’ve picked a definition to use as a starting point. As you gain more experience, you’ll be able to explore the nuanced and complex world surrounding this topic. Now, without further ado, let’s dig in!
Java unit testing: The fundamentals
Let’s answer the most fundamental questions about Java unit testing: What Is unit testing in Java?
Unit testing means testing an application with automatic tests written in a programming language. Unit tests are simple tests that exercise a small portion of the application code in isolation to verify whether they behave as expected. This small portion is what we call a unit, but what’s a unit? In my experience, most people define a unit as a method or function, so that definition will suffice for us.
Is unit testing important in Java?
If you think that unit testing requires a lot of time and effort, you’re right. So why do people do it, in Java or otherwise? What’s the appeal?
- Bug prevention: Unit tests catch bugs early, ensuring better code quality by addressing issues before they reach production.
- Self-documenting code: Well-written tests also serve as code documentation, making the code’s functionality clear, making onboarding of new team members easier, and facilitating the maintenance of the code.
- Easier refactoring: A comprehensive set of unit tests acts as a safety net for you and your team, instilling confidence so you can make structural improvements to the code in a safe way.
- Cleaner code: Unit testing encourages best practices, resulting in more modular, loosely coupled, and readable code that’s easier to maintain.
How do you write unit tests in Java?
Think of unit tests as small programs that test your program. Software engineers write unit tests using the same language they use for the production code, which we usually call SUT for “system under test.”
To write unit tests, you need a unit testing framework. They are usually named SomethingUnit, such as PHPUnit for PHP, NUnit for .NET, and JUnit for Java. We refer collectively to these tools as the xUnit family of unit testing frameworks. The unit testing framework enables you to write expectations, which we call “assertions,” about the behavior of the code, using a set of special classes and methods.
The framework typically comes with a unit test runner, a tool to execute tests and determine if they pass or fail automatically. This is a key point of unit tests: you shouldn’t need to manually verify whether the tests passed or not.
It’s a best practice to add unit tests, along with other automated tests, when applicable to your CI/CD pipeline. This ensures that each time a developer pushes changes to the mainline, the application undergoes testing. If a test fails, the pipeline stops, preventing the faulty code from reaching production or another environment, such as QA or staging. The developer who is responsible and the whole team are notified and can then fix the issue.
Java unit testing: A practical introduction
Time to roll up your sleeves and start testing.
Obtaining the SUT
You’ll start by getting the SUT—that is, the project you’ll be testing. To make your life easier, I’ve already prepared the project for you. Start by cloning it:
git clone https://github.com/carlosschults/jtask
After cloning, open the project using your favorite IDE or code editor. Then open the file at src/main/java/org/example/Task.java. You’ll see the following contents (imports and package statements are omitted for brevity):
public class Task {
private String description;
private boolean isComplete;
private LocalDate dueDate;
public Task(String description) {
this.description = description;
this.isComplete = false;
}
public Task(String description, LocalDate dueDate) {
this.description = description;
this.isComplete = false;
this.dueDate = dueDate;
}
public String getDescription() {
return description;
}
public boolean isComplete() {
return isComplete;
}
public void complete() {
isComplete = true;
}
public void postponeByDays(int days) {
if (dueDate == null) return;
if (days < 0)
throw new IllegalArgumentException(“The number of days must be positive!”);
dueDate = dueDate.plusDays(days);
}
public LocalDate getDueDate() {
return dueDate;
}
}
It’s a plain old Java class that represents a Task entity. Imagine we’re creating a command-line-based to-do app. It’s a super simple class, but it does have some business logic we can test. And that’s what we’re doing next.
How do you create a basic Java unit test?
First of all, let’s install JUnit. We’ll use JUnit 5, which is the latest major release. Since the sample project uses Maven, add the following dependencies to your pom.xml file:
<dependency>
<groupId>org.junit.jupiter</groupId>
<artifactId>junit-jupiter-engine</artifactId>
<version>5.9.2</version>
<scope>test</scope>
</dependency>
As you can see, we’re using version 5.9.2, which is the latest release as of this writing. After the dependency is installed, you’ll be ready to start writing your tests.
Create a class under test/java and call it TaskTest.java (it’s a common practice to name test classes after the production class and append the word “Test”). The class should have the following contents:
import org.junit.jupiter.api.Test;
import org.junit.jupiter.api.Assertions;
public class TaskTest {
@Test
public void Test1() {
Assertions.assertEquals(4,2 + 2);
}
}
As you can see, the class has a single method, Test1(), marked with the @Test annotation. The annotation is what we use to inform JUnit that Test1() is a test method.
The method then uses the assertEquals method from the Assertions class to say that it expects that 2 + 2 results in 4. You’ll see a green “play” sign to the left of the method’s name on IntelliJ IDEA. Click on it and the test will be executed.
You’ll see something like the following:
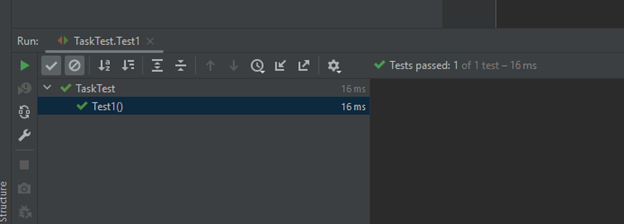
The test unsurprisingly passes, as you can see. However, it doesn’t have anything to do with our class. Let’s change that. Replace the Test1() with the following code:
@Test
public void testCompletion_WhenTaskNewlyCreated_ThenTaskIsCompleted() {
Task sut = new Task(“Write the report for sales department”);
sut.complete();
Assertions.assertTrue(sut.isComplete());
}
Run the test and you’ll see that it passes. But what’s happening here? Notice that the test has three distinct phases:
- First, we arrange the scenario for the test, creating the object we’ll test against.
- Then we act—that is, we perform the behavior we wish to verify.
- Finally, we assert that something happened in the way we expected, in this case that the isComplete() method returns true.
This is what we call the AAA pattern, for arrange-act-assert. It’s a good practice to follow this pattern when writing your tests. In longer, more complex tests, you might want to add comments designating each section:
@Test
public void aLongTestMethod() {
// arrange
// several lines in here
// act
// several lines in here
// assert
// a few lines
}
There are two more things I want to draw to your attention. I named the variable representing the object against which we assert SUT, for “system under test.” Also, the test method’s name is longer than what is usually considered a good name in production code. But in test code, we consider it a good name since it follows a useful convention. It’s split into three parts: the first one indicates the unit we’re testing, the second refers to a specific scenario we’re testing, and the final one expresses the desired outcome.
Adding more tests
Another interesting method we can test is the postponeByDays() one. As you can see, it gets an integer as a parameter and then postpones the due date of the task by how many days it’s received.
Let’s add a test that asserts that the due date shouldn’t change if we pass zero as an argument:
@Test
public void testPostpone_WhenPassingZero_DueDateShouldNotChange() {
// arrange
Task sut = new Task(“some description”, LocalDate.of(2024, 2, 15));
// act
sut.postponeByDays(0);
// assert
LocalDate expected = LocalDate.of(2024, 2, 15);
Assertions.assertEquals(expected, sut.getDueDate());
}
Now let’s add yet another test, asserting that the due date changes by the expected amount when we pass a value greater than zero:
@Test
public void testPostpone_WhenPassingLargerThanZeroValue_DueDateShouldBeUpdatedByTheCorrectAmount() {
// arrange
Task sut = new Task(“some description”, LocalDate.of(2024, 2, 15));
// act
sut.postponeByDays(10);
// assert
LocalDate expected = LocalDate.of(2024, 2, 25);
Assertions.assertEquals(expected, sut.getDueDate());
}
Up until now, we’ve tested only the happy path, i.e., what happens when everything goes smoothly. Well, unfortunately, things do go wrong in programming, and your unit tests need to account for that as well. The following test verifies whether the code under test throws the appropriate exception when we pass a negative value to postponeByDays().
@Test
public void testPostpone_WhenPassingANegativeValue_ShouldThrow() {
// arrange
Task sut = new Task(“some description”, LocalDate.of(2024, 2, 15));
// act, assert
Assertions.assertThrows(IllegalArgumentException.class, () -> {
sut.postponeByDays(-1);
});
}
Here we use a different assertion method to express that we expect an exception in the tested scenario. If the exception is indeed thrown, the test passes; otherwise, it fails.
Now, as an exercise, identify and write more test cases for the class.
Wrapping up
Long gone are the days when quality was solely a QA department’s concern. In modern software development, it’s a given that everyone will test, and developers take part in the effort by writing automated tests, particularly of the unit test variety.
In this article, you’ve learned:
- What unit tests are, and why they’re important
- The workings of unit testing in Java
- How to install Junit
- How to name and structure your unit tests according to popular best practices
Where should you go now? There’s a lot to explore and learn, that’s for sure. For starters, I recommend you take a good look at JUnit’s official site. There are a ton of useful guides there, and you’ll certainly learn by doing it.
Other than that? Get your hands dirty and start exploring. Write many tests, read about best practices, and never stop learning. Here are a few topics you might want to look at:
- Parameterized tests
- Mocking and mocking libraries
- TDD
This post was written by Carlos Schults. Carlos is a consultant and software engineer with experience in desktop, web, and mobile development. Though his primary language is C#, he has experience with a number of languages and platforms. His main interests include automated testing, version control, and code quality.